Blog

  • Quick fixes for standing all day foot pain

    Quick fixes for standing all day foot pain

    Defining the Nature of Standing-Induced Foot Pain

    (I) Conceptualizing the Problem

    When we discuss the physical burden of remaining upright for extended periods, we are essentially describing a specific type of musculoskeletal stress that arises from static posture. This is not merely a sensation of general tiredness but rather a distinct condition where the structural support system of the feet undergoes continuous pressure. The core issue lies in the prolonged duration of the activity without adequate respite for the complex network of bones, ligaments, and muscles that comprise the lower extremities. It is a phenomenon that transcends simple fatigue and enters the realm of potential chronic discomfort if left unaddressed.

    (II) Core Elements of the Condition

    To fully grasp the scope of this issue, one must examine the fundamental components involved. The primary element is the gravitational force exerted on the plantar aspect of the foot over many hours. This constant pressure impedes normal fluid return and compresses the soft tissues. Another critical element is the lack of dynamic movement. When standing still, the venous pump mechanism, which usually relies on muscle contractions to circulate blood, operates less efficiently. These elements combine to create the specific type of soreness and pain that workers report after long shifts.

    1. Structural Stress
      The architectural design of the human foot is meant for mobility. When forced into a static position, the arches bear a sustained load that can lead to strain and inflammation.
    2. Fatigue Factors
      Beyond the mechanical stress, there is the metabolic fatigue of the muscles. The intrinsic muscles of the foot work tirelessly to maintain balance, leading to a buildup of metabolic waste products that contribute to the sensation of pain.

    Analyzing the Mechanisms of Pain and Relief

    (I) Understanding Circulatory Responses

    A significant portion of the discomfort experienced after standing all day can be attributed to circulatory stagnation. The blood tends to pool in the lower extremities due to gravity. Therefore, any intervention that aims to mitigate this pain must address the flow of blood. It is observed that increasing circulation is paramount to reducing pain [1]. By enhancing the blood flow to the affected areas, the body is better able to clear out metabolites and supply oxygen to fatigued tissues, which is essential for recovery.

    (II) Therapeutic Interventions

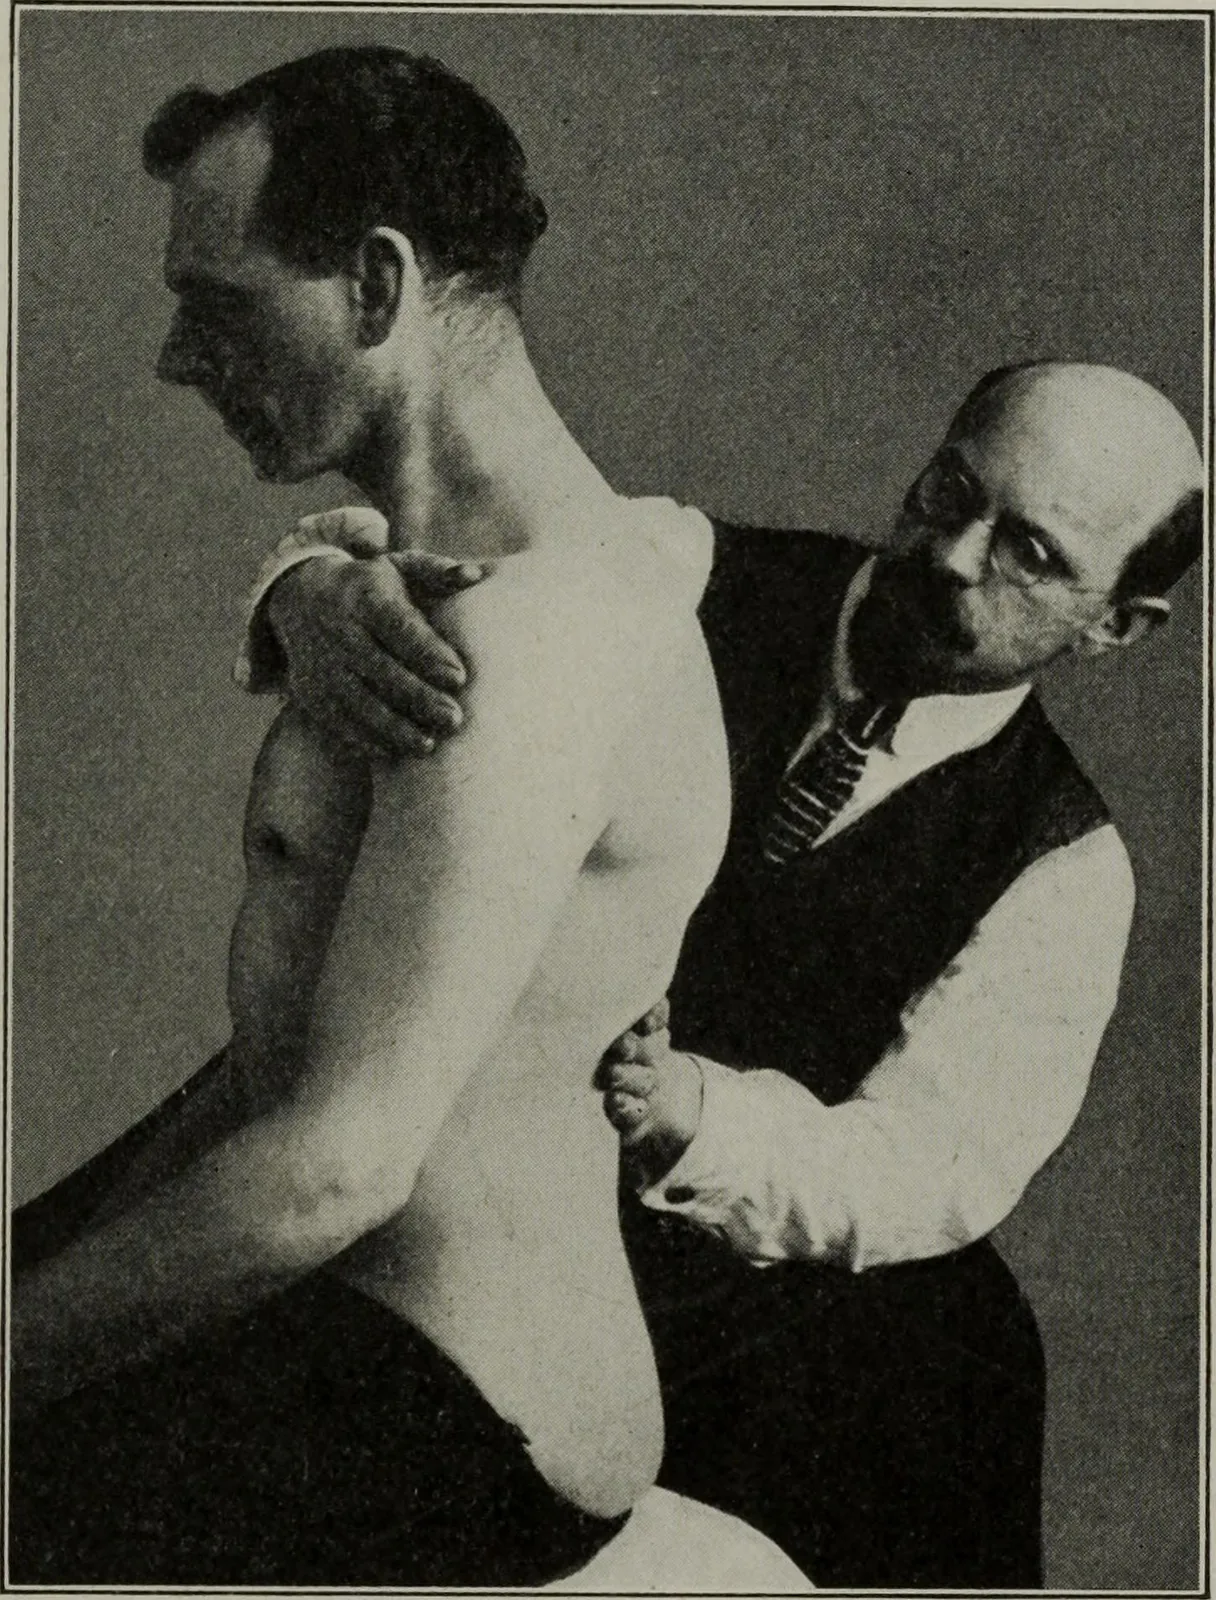
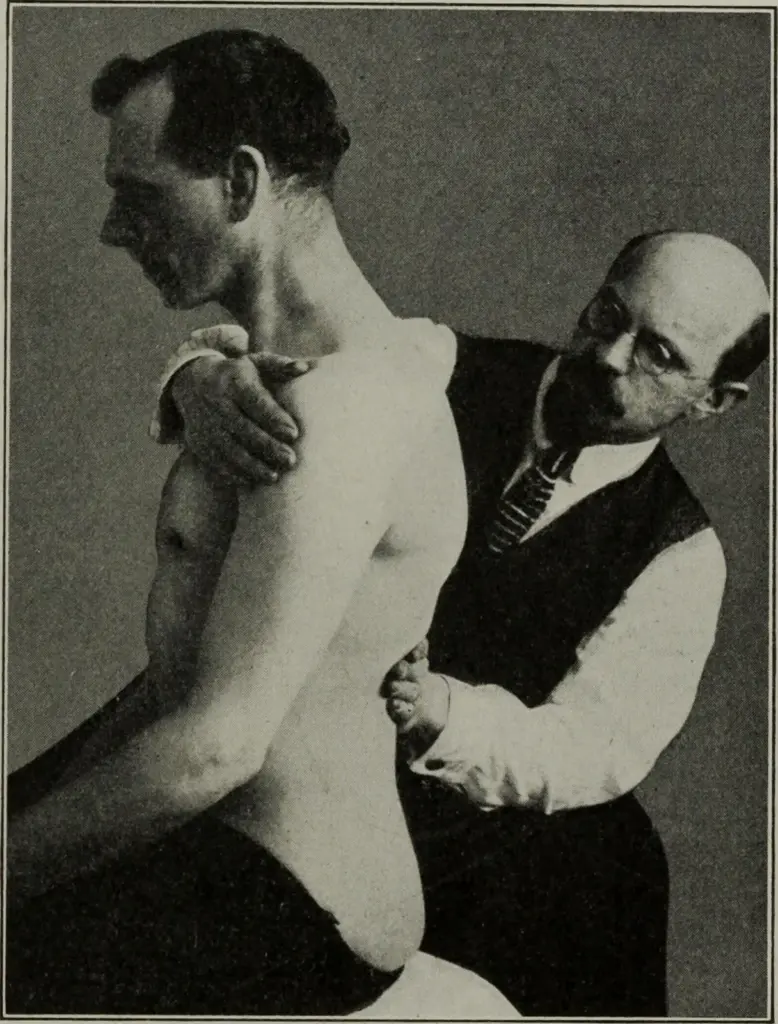
    Several mechanisms can be employed to interrupt the pain cycle. These are not merely anecdotal fixes but are grounded in basic physiological principles regarding tissue healing and nerve response. The application of external stimuli, such as temperature or physical touch, can alter the perception of pain and the underlying tissue condition.

    1. Manual Stimulation
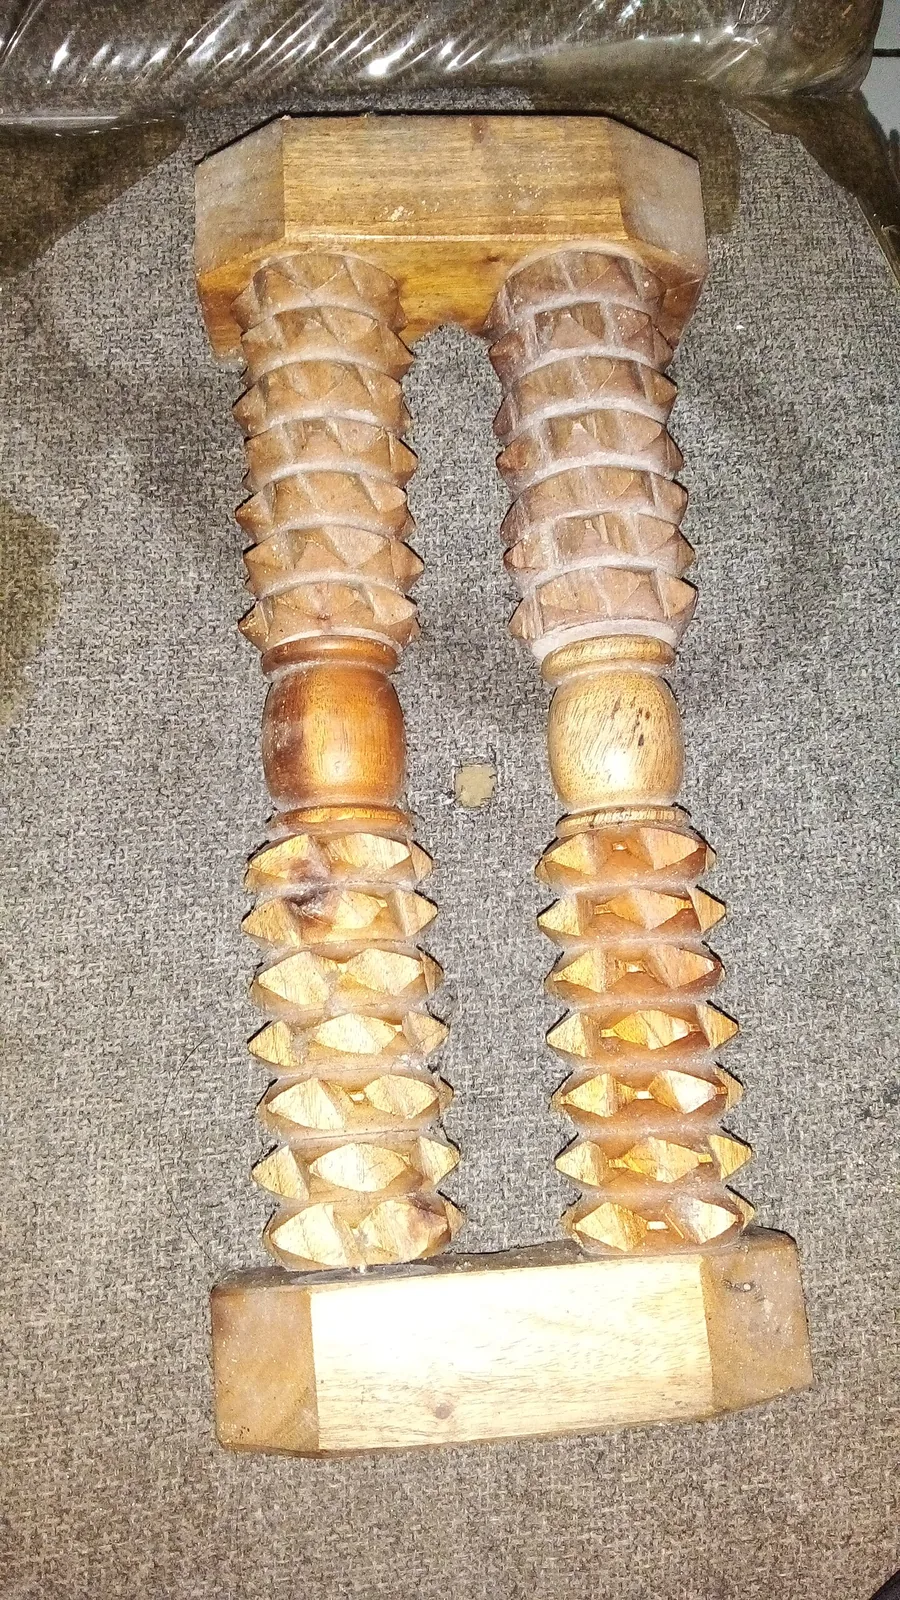
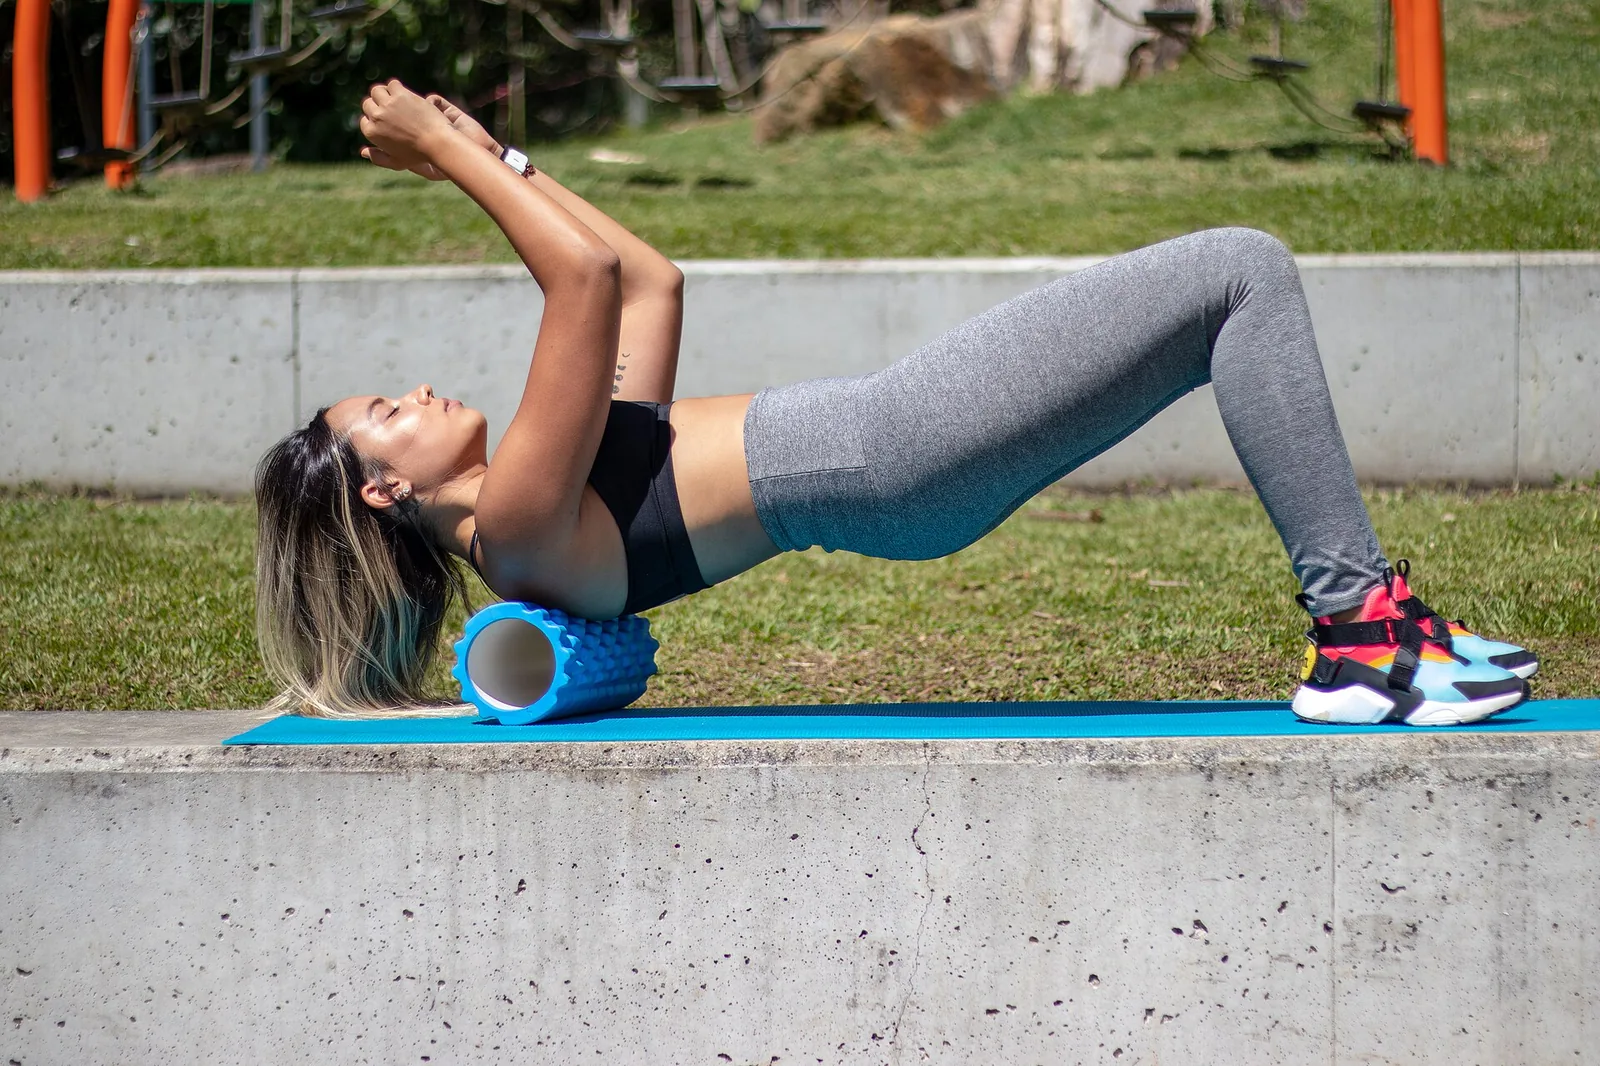
      The act of rubbing sore feet is a direct method to influence the local physiology. It is noted that rubbing the feet can help increase blood flow and reduce pain [1]. This mechanical action serves to warm the tissues and stimulates nerve endings in a way that can override pain signals.
    2. Thermal Regulation
      The use of heat and cold is another cornerstone of symptomatic relief. Both heat and cold modalities can help reduce foot pain after standing all day [1]. While heat typically serves to relax tense muscles and improve circulation, cold therapy can act to numb acute pain and reduce inflammation. The choice between them often depends on the specific nature of the discomfort, but both are valid tools for providing quick relief.

    Identifying High-Risk Professions and Scenarios

    (I) Occupational Categories

    It is important to recognize that this condition does not manifest randomly. There is a strong correlation between specific occupational categories and the incidence of standing-related foot pain. Certain professions demand an upright posture as a fundamental requirement of the job, making the workers in these fields particularly susceptible to the condition. Identifying these groups helps in understanding the prevalence of the issue and targeting interventions effectively.

    (II) Common Environments

    The environments where these issues arise are typically characterized by hard surfaces and rigid schedules. Workers are often unable to sit or take breaks to offload their feet. The risk context is broad, encompassing various sectors of the economy where labor is physically demanding in terms of posture rather than heavy lifting.

    1. Healthcare Settings
      Professionals in the healthcare industry, such as nurses and support staff, are among the most frequently affected. The nature of patient care requires constant movement and standing, often for twelve hours or more at a time [1].
    2. Industrial and Retail Spaces
      Beyond healthcare, the risk extends to those in construction and factory work [1]. Similarly, retail sales associates and salon workers spend the majority of their shifts on their feet, often on concrete or tile floors that exacerbate the stress on the lower limbs [1].

    Applying Relief and Prevention Strategies

    (I) Immediate Remedial Actions

    For those currently experiencing the effects of a long shift, immediate remedial actions are necessary to restore comfort. These strategies focus on reversing the physiological stress accumulated during the day. The goal is to transition the body from a state of work-induced stress to a state of rest and recovery as efficiently as possible.

    (II) Long-term Prevention

    While immediate relief is crucial, a more sustainable approach involves preventing the pain before it starts. This requires a proactive stance, utilizing tools and techniques to prepare the feet for the demands of the job. Prevention is generally more effective than treatment, as it addresses the root causes of the strain rather than just the symptoms.

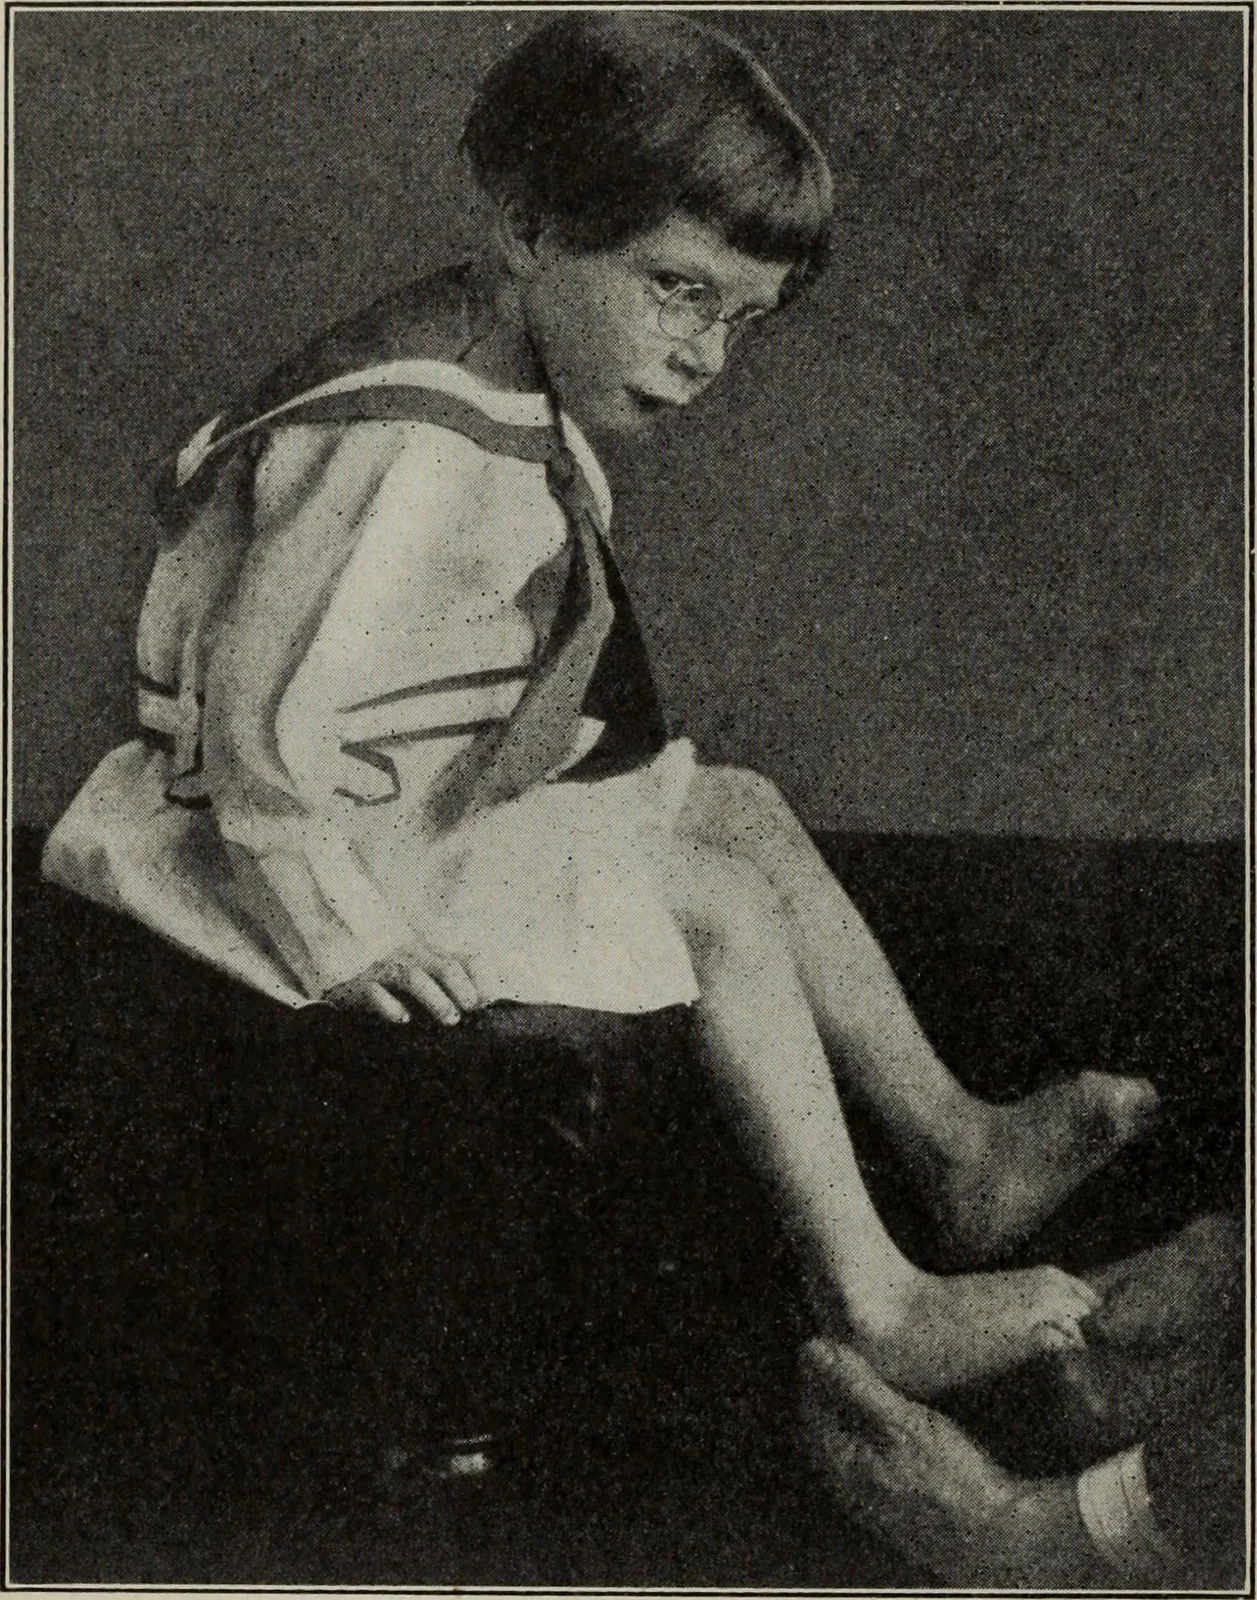
    1. Stretching Protocols
      Engaging in regular stretching is a highly effective preventative measure. Stretching helps prevent foot pain from standing all day [1]. By maintaining flexibility in the calf muscles and the plantar fascia, the mechanical load on the foot is distributed more evenly, reducing the peak stress points that lead to pain.
    2. Orthotic Support
      The use of supportive devices is another key strategy. Using orthotics can help prevent foot pain from standing all day [1]. These devices provide custom or semi-custom support to the arches of the foot, correcting biomechanical imbalances and cushioning the impact against hard surfaces.

    Navigating Limitations in Work Environments

    (I) Adapting to Fixed Conditions

    A common source of frustration for many workers is the inability to alter their work environment. Changing jobs or modifying the physical workspace to include more seating is often not an option. Therefore, the management of foot pain must be approached from the perspective of what the individual can control outside of work hours. The reality is that while the work situation may be static, the body’s response to it can be dynamic and manageable.

    (II) Home-Based Management

    Even when the professional context cannot be changed, there are viable pathways to relief that can be implemented at home. It is generally understood that even if one cannot change the work situation, there are still ways to help relieve foot pain at home [1]. This empowers the individual to take ownership of their recovery, utilizing the home environment as a place for restorative care.

    1. Feasibility of Treatments
      The treatments discussed, such as rubbing, thermal therapy, and stretching, are all highly accessible and do not require expensive equipment or significant time investments. This makes them practical solutions for people who are already exhausted from their workday.
    2. Consistency in Care
      The key to success in these scenarios is consistency. Applying these remedies regularly after shifts can prevent acute pain from becoming a chronic condition. It is about creating a routine that counteracts the daily wear and tear on the feet.
  • Best recovery tools for foot pain in 2026

    Best recovery tools for foot pain in 2026

    Understanding the Landscape of Foot Recovery Interventions

    When we look at the current state of foot care in early 2026, it becomes increasingly clear that managing discomfort goes far beyond simple rest or ice. The approach to alleviating foot pain has evolved into a sophisticated ecosystem of tools and methodologies designed to address the root causes of biomechanical dysfunction. To truly grasp how to navigate the available options, one must first understand the fundamental categories of intervention that dominate the landscape today. These tools are generally categorized into passive support systems, such as orthotics, and active rehabilitation strategies, which include specific training regimens and footwear choices. The distinction between these two approaches is critical because they serve different, yet complementary, roles in the recovery process. Passive tools often aim to offload stress and correct structural alignment immediately, while active tools focus on long-term strengthening and neuromuscular re-education. By comprehending the scope of these interventions, individuals can make more informed decisions about which tools might best suit their specific physiological needs rather than relying on a one-size-fits-all solution.

    Deep Dive into Orthotic Interventions

    Orthotic therapy remains one of the most widely utilized methods for addressing foot and ankle pathologies, and for good reason. As we examine the clinical utility of these devices, it is important to recognize that they are fundamentally defined as a non-surgical and conservative method of treatment [1]. This distinction is vital for patients who wish to avoid invasive procedures. The primary utility of orthotics lies in their ability to manage and treat a variety of conditions affecting the foot and ankle without the need for surgical intervention. However, their application is not merely reactive. A significant portion of their value comes from their preventive capabilities. By altering the way forces are transmitted through the foot, orthotics can prevent the progression of existing deformities or the development of new pathologies.
    The mechanism by which these devices achieve such outcomes is multifaceted. One of the core functions is the reduction of pressure on specific affected areas. When a person suffers from plantar fasciitis or metatarsalgia, for instance, high-pressure zones under the foot can exacerbate inflammation and pain. Orthotics redistribute these forces, providing a cushioning effect that alleviates the stress on vulnerable tissues. Beyond mere pressure redistribution, these tools play a pivotal role in promoting functional rehabilitation. By stabilizing the foot and ensuring proper alignment, they create an environment where healing can occur more efficiently. They essentially guide the foot into a more optimal position during the gait cycle, which facilitates better movement patterns and supports the overall recovery of function [1]. This dual capacity to both mitigate immediate symptoms and foster long-term healing makes them a cornerstone of conservative foot care.

    The Role of Foot Core Training and Minimalist Footwear

    While orthotics provide external support, a growing body of evidence suggests that internal strengthening is equally, if not more, important for long-term foot health. This brings us to the concept of the “foot core,” a paradigm shift that views the intrinsic muscles of the foot much like the core muscles of the trunk. Foot core training, often coupled with the use of minimalist footwear, has gained significant traction as a recovery tool. The primary applicability of this approach lies in its ability to increase the intrinsic strength of the foot. Unlike traditional supportive shoes that may restrict natural movement, minimalist footwear allows the foot to move more naturally, engaging the small stabilizing muscles that often atrophy in cushioned shoes.
    The impact of these interventions extends across several dimensions. First and foremost is the effect on muscle morphology. Research indicates that targeted exercises can lead to hypertrophy, or an increase in the size of the intrinsic foot muscles. Larger, stronger muscles are better equipped to handle the loads placed upon them during daily activities. Secondly, we observe marked improvements in strength performance. As these muscles develop, the foot becomes more rigid when needed for push-off and more flexible when adapting to uneven terrain. Finally, and perhaps most importantly, these tools induce changes in biomechanics [2]. During dynamic tasks, such as walking or running, a stronger foot core alters the biomechanical profile of the lower limb. This can lead to a more efficient gait, reduced energy expenditure, and a lower risk of injury. These interventions are particularly effective for inducing biomechanical changes during dynamic tasks, making them essential for active individuals looking to return to sport or high-level activity.

    Evaluating the Criteria for Effective Recovery Tools

    With a plethora of gadgets and devices flooding the market in 2026, establishing a set of criteria for judging their efficacy is necessary. Not all tools are created equal, and understanding what makes a recovery tool effective can save consumers time and money. For orthotic devices, the key criterion is customization and the specific pathology it addresses. An effective orthotic must not only fit the contour of the foot but also address the specific biomechanical fault, whether it is excessive pronation or supination. The material properties also matter, as they determine the balance between cushioning and rigidity.
    When evaluating foot core training tools, such as resistance bands or specific exercise platforms, the focus shifts to progressive overload and functional specificity. The tool must allow for an increase in difficulty as strength improves to ensure continued adaptation. For minimalist footwear, the criteria involve a gradual transition protocol and the geometry of the shoe. A shoe that is too minimal too quickly can lead to injury, so the best tools on the market often come with structured guidelines for transitioning from traditional shoes. Furthermore, the shoe should have a wide toe box to allow for natural toe splay and a zero-drop heel to promote a more natural posture. By applying these rigorous standards, one can filter out ineffective gadgets and focus on tools that offer genuine therapeutic value.

    Practical Utility and Value in Daily Life

    The theoretical benefits of these recovery tools are well-documented, but their true value is realized in their practical application within daily life. For the office worker who spends hours standing, orthotic interventions can be the difference between a day characterized by pain and one of comfort. The减压 (pressure relief) provided by a well-made insole allows for prolonged standing without the inflammatory backlash that might otherwise occur. Similarly, for the recreational runner, integrating foot core exercises into a warm-up routine can enhance running economy. The value here is not just in pain reduction, but in performance enhancement. It is about enabling a lifestyle that is not limited by foot discomfort.
    Moreover, the use of minimalist footwear for casual walking around the home or neighborhood can serve as a form of continuous training. Every step taken in these shoes acts as a micro-workout for the foot muscles, contributing to cumulative strength gains over time. This is where the practical value intersects with convenience. The most effective recovery tools are those that seamlessly integrate into a person’s existing routine rather than requiring dedicated time slots that are hard to maintain. Whether it is the immediate relief offered by an orthotic during a flare-up or the long-term structural integrity built through foot core training, the utility of these tools is measured by their ability to restore and maintain an individual’s quality of life.

    Navigating Common Misconceptions in Foot Recovery

    Despite the wealth of information available, several misconceptions persist that can hinder recovery. A common fallacy is the belief that orthotics are a “cure” that one must wear forever. While they are indispensable for the treatment and prevention of conditions [1], they should ideally be viewed as a temporary assistive device while the foot is strengthened. Over-reliance on external support can potentially lead to weakness in the intrinsic muscles if not paired with active rehabilitation. This underscores the importance of combining the passive support of orthotics with the active engagement of foot core training.
    Another area of confusion involves the use of minimalist footwear. Many assume that simply switching to barefoot-style shoes will automatically fix their foot pain. However, the literature suggests that these tools are most effective when used to induce biomechanical changes and increase muscle strength [2]. Without the requisite muscular foundation, abruptly switching to minimalist shoes can exacerbate problems. Therefore, the “best” tool is not a single product but a strategic combination of interventions. It involves using orthotics to manage pain and create a healing environment while simultaneously engaging in foot core training to address the underlying weakness. Recognizing that recovery is a process requiring a multifaceted approach is the key to navigating the landscape of foot pain relief tools in 2026.

  • Does TENS therapy work for foot pain

    Does TENS therapy work for foot pain

    Understanding the Basics of TENS Therapy

    When we talk about managing foot pain, especially the kind that just doesn’t seem to go away with rest, the conversation often turns toward modern gadgetry and physical therapy tools. One term that pops up frequently is TENS, which stands for Transcutaneous Electrical Nerve Stimulation. It sounds technical and perhaps a bit intimidating at first glance, but when you break it down, it is actually a very straightforward concept. Essentially, TENS is a method used to relieve pain that is non-invasive, meaning it does not require breaking the skin or any surgical procedures. It is generally considered to be quite affordable compared to other medical interventions, and perhaps one of its most appealing features is that it is a self-operable technology. You can manage the treatment yourself in the comfort of your own home without needing a medical professional to be standing right next to you.
    It is important to categorize this correctly within the medical landscape. TENS falls squarely under the umbrella of non-pharmacological interventions. In simpler terms, this means it treats pain without the use of drugs or medications. For patients who are looking to avoid the side effects that often come with painkillers, or those who simply cannot take certain medications due to other health issues, this distinction is vital. The therapy primarily aims to address both acute and chronic pain conditions. Whether you have twisted an ankle recently or have been suffering from persistent nerve discomfort in your feet for years, TENS is often presented as a viable option to consider.

    The Science Behind the Mechanism

    To really understand why this therapy is used, we have to look under the hood at the basic principles and mechanisms of action. The human body is a complex electrical system, and nerves communicate with the brain through electrical signals. When you feel pain, it is because specific nerves are sending a “danger” signal to your brain. TENS units work by generating their own electrical impulses. These impulses travel through electrodes placed on the skin, specifically targeting the nerves that are transmitting the pain signals.
    There are a couple of leading theories on how this actually stops the pain. One widely accepted explanation is the Gate Control Theory of pain. Imagine the spinal cord has a “gate” that allows pain signals to pass through to the brain. The electrical stimulation from the TENS unit is thought to essentially close this gate. By stimulating non-pain-carrying sensory fibers, the device blocks the slower pain-carrying fibers from sending their message to the brain. It is essentially a game of neurological traffic control where the TENS signal gets priority and the pain signal gets stuck at the gate.
    Another mechanism involves the body’s own natural painkillers. It is believed that certain frequencies of electrical stimulation can encourage the body to release endorphins. These are chemicals produced naturally by the body that act similarly to opioid pain relievers but without the synthetic additives. When using lower frequency settings, often described as a pulsing sensation rather than a steady buzz, the body may release these endorphins to provide a more lasting relief that continues even after the device is turned off. This dual approach—blocking pain signals and promoting natural chemical relief—is what makes the mechanism so interesting to researchers and clinicians alike.

    Identifying Key Features and Safety Standards

    When evaluating any medical device, safety is always the primary concern, and this is an area where TENS units generally shine. One of the most significant advantages of this technology is that it has very few side effects. Unlike oral medications that can affect the stomach, liver, or kidneys, TENS therapy is localized. The most common side effect, if any occurs at all, is usually mild skin irritation where the electrode pads are placed. This is typically due to the adhesive on the pads or the sensitivity of the skin to the electrical current, and it often resolves quickly once the pads are removed.
    Another critical feature to consider is the safety profile regarding dosage. There is virtually no risk of overdose with TENS therapy. You cannot take “too much” electricity in the same way you can take too many pills. If the intensity is set too high, it will simply feel uncomfortable, causing the user to turn it down immediately. This inherent safety limit makes it a very low-risk option for managing pain at home.
    Furthermore, the control of the treatment is largely in the hands of the patient. This concept, often referred to as self-titration, means that the individual can adjust the treatment dose according to their specific needs at any given moment. If the pain is flaring up, the intensity or duration can be increased. If it is a mild day, the settings can be reduced. This autonomy allows for a personalized pain management strategy that rigid medication schedules cannot always offer. It empowers the patient to listen to their body and respond accordingly, which is a crucial aspect of chronic pain management.

    Practical Applications for Foot Pain

    Moving from the general theory to the specific application, let us look at how this applies to the feet. The feet are a complex structure of bones, muscles, and nerves, and they bear the weight of the entire body every day. This makes them particularly susceptible to various types of pain, from plantar fasciitis to metatarsalgia and general neuropathy. For nerve-related foot pain, which can feel like burning, tingling, or shooting sensations, TENS can be particularly effective. By targeting the specific nerves in the foot or ankle, the device can help disrupt those constant, distracting signals that make walking or even resting difficult.
    For muscle-related pain in the feet, such as arch cramps or soreness from overuse, the therapy can help reduce muscle tension and promote relaxation. While TENS is primarily for nerve stimulation, the rhythmic pulsing can have a secondary effect on tight muscles, helping to decrease spasms. The application involves placing small, sticky electrode pads around the area of pain. For instance, if the pain is in the heel, one pad might be placed on the bottom of the heel and another on the top of the foot or near the ankle to create a circuit through the painful area.
    The value of this therapy lies in its ability to provide relief without sedation. Unlike strong painkillers that might make a person drowsy or foggy, TENS allows individuals to remain alert and active. This is particularly important for foot pain, as mobility is often compromised. By managing the pain effectively, patients can maintain a more active lifestyle, engage in physical therapy exercises with less discomfort, and generally improve their quality of life without the “zombie-like” side effects of pharmaceuticals.

    Historical Context and Common Misconceptions

    It is easy to assume that TENS is a brand new technology given the sleek design of modern units, but the research behind it is actually quite extensive. The first clinical studies regarding TENS were published over five decades ago. This means that for more than half a century, scientists and doctors have been looking into how electricity can interact with our nervous system to alleviate suffering. Over the years, the technology has evolved from large, cumbersome machines found only in clinics to portable, battery-operated devices that fit in a pocket.
    Despite its long history, there are still some misconceptions about what TENS can and cannot do. One common misunderstanding is that TENS is a “cure” for the underlying condition. It is important to clarify that TENS is a symptomatic treatment. It manages the pain, but it does not fix the structural issue causing the pain, such as a bone spur or a damaged nerve. Think of it as a tool to help you function better while your body heals or while you manage a chronic condition.
    Another point of confusion is the difference between TENS and EMS (Electrical Muscle Stimulation). While they both use electricity and look similar, EMS is designed to contract muscles to build strength or prevent atrophy, whereas TENS is strictly for pain relief. Using the wrong device for the wrong goal can lead to disappointment. Understanding the history and the specific intent of the technology helps users set realistic expectations. It is a battle-tested, safe, and effective method for pain management, but it works best as part of a broader care plan rather than a standalone magic bullet.

  • Foot massage guns versus foam rollers

    Foot massage guns versus foam rollers

    How They Apply Pressure

    The fundamental difference lies in how force is generated. With a foam roller, you are the engine. You lie on the floor, position your foot over the cylinder, and press down. The pressure comes entirely from your own body weight against gravity. It is static, broad, and often intense because you can’t easily modulate the force once you commit to the position.
    A massage gun works differently. It is a tool of percussion. You hold the device against the arch of your foot, and a motor drives a head back and forth rapidly. The force comes from the mechanical impact, not your body weight. You don’t have to balance or contort your body to dig into a muscle knot. You just hold the machine there and let it hammer away. This distinction changes everything about the experience.

    The Foam Roller Reality

    Using a foam roller on your feet feels like a blunt instrument. It is designed for large muscle groups like the quads or lats, where the surface area is wide and flat. The foot is narrow, bony, and curved. When you try to roll a foot over a standard six-inch roller, it feels unstable.
    You have to tilt your ankle at awkward angles to hit the plantar fascia. It is easy to roll over the ankle bone or the Achilles tendon, which sends a sharp jolt of pain that makes you wince. However, for general myofascial release, it is effective. You can sweep the entire length of the sole in one motion. If you don’t mind the floor work and the balancing act, it covers a lot of ground quickly. It is low-tech and reliable, provided you have the floor space to lie down.

    Precision of the Massage Gun

    If the foam roller is a sledgehammer, the massage gun is a scalpel. This is where the device shines for foot recovery. The feet are packed with small, intricate muscles and tendons. A roller cannot easily isolate the flexor digitorum brevis or the abductor hallucis without hitting everything around it. A massage gun can.
    You switch to a bullet head attachment, place it directly on the trigger point, and turn it on. The vibrations penetrate deep into the tissue without compressing the bones. This is crucial for areas like the heel, where putting weight on a roller can be excruciating. The gun allows you to treat the inflammation without adding the compressive load of your body weight. It is also faster. A minute of targeting a specific knot often yields relief that takes ten minutes of rolling to achieve.

    Recovery Contexts and Limitations

    Neither tool is perfect for every situation.
    After a long run, when the entire foot feels tight and inflamed, the foam roller can be too aggressive. The broad pressure might irritate already swollen tissues. In this state, the massage gun is risky too if the setting is too high. Sometimes, gentle manual stretching or a simple ball rolling under the desk is safer than power tools.
    Conversely, for chronic tightness or “cold” feet before a workout, the massage gun acts as an excellent activator. The percussion stimulates blood flow rapidly, warming up the tissue. The foam roller is better for a post-workout cool-down when you want to strip out the tension across the whole lower leg chain, calf, and foot simultaneously.
    Cost and convenience are major factors. A foam roller costs twenty dollars and never runs out of batteries. You can leave it in the corner of the room. A massage gun requires charging, it makes noise, and you have to store it somewhere. If you just want to loosen up your feet while watching TV, the gun is easier to manage from the couch. You don’t have to get on the floor.

    Choosing the Right Tool

    The decision comes down to specificity versus coverage.
    If your issue is general soreness or you want to improve overall mobility in the lower extremities, the foam roller is sufficient. It forces you to engage your core and balance, which has its own rehabilitative benefits. It is the “dumbbell” of recovery tools—simple, versatile, and effective for the basics.
    If you have a specific diagnosis like plantar fasciitis, or if you carry distinct knots in your arch that won’t go away, the massage gun is the superior choice. The ability to target localized, deep muscle tension without crushing the surrounding structures is a game-changer. It saves time and spares your joints.
    For most people dealing with foot pain, the gun offers a more user-friendly path to relief. It requires less physical effort to operate, which matters when you are already tired. The roller demands effort you might not have after a ten-hour shift. But if budget is a constraint, do not underestimate a simple roller. It has done the job for decades before percussion therapy became a trend. It works, provided you are willing to put in the work.

  • How to use a lacrosse ball for heel pain

    How to use a lacrosse ball for heel pain

    Omg, you guys.
    If you’ve ever felt like you’re stepping on a nail first thing in the morning… I feel you.
    That sharp, stabbing pain in your heel?
    It’s literally the worst way to start the day.
    I used to limp to the kitchen like a zombie.
    Thinking, “I’m too young for this.”
    But guess what?
    I found a fix.
    And it costs like, five dollars.
    It’s just a lacrosse ball.
    Seriously.
    This little rubber ball changed my feet game completely.
    Today, I’m spilling the tea on exactly how to use it.
    No medical jargon.
    Just real talk.
    Let’s save your soles, besties.
    【Get Your Gear Ready】
    First things first.
    You need the right ball.
    Don’t grab a squishy tennis ball.
    It’s too soft.
    It won’t dig deep enough.
    You need a lacrosse ball.
    It’s firm.
    It’s solid rubber.
    It gets into those nasty knots.
    You can find them at any sports store.
    Or order one online right now.
    Okay, where are we doing this?
    Anywhere.
    Seriously.
    I do it while I’m watching Netflix.
    Sometimes under my desk at work.
    Even in the kitchen while waiting for my coffee.
    You just need a chair.
    And a flat floor.
    That’s it.
    Take your shoes off.
    Socks on or off, up to you.
    I prefer bare skin.
    You can feel the texture better.
    Ready?
    Let’s roll.
    【The Basic Roll】
    Sit down in your chair.
    Keep your back straight.
    Don’t slouch, guys.
    Posture matters.
    Place the ball under one foot.
    Start with the heel.
    Put some weight on it.
    How much?
    As much as you can handle.
    It should feel like a “good hurt.”
    Not an “I’m dying” hurt.
    Slowly roll the ball forward.
    Move towards your arch.
    Then your toes.
    Then roll back.
    Think of it like a slow wave.
    Back and forth.
    Don’t rush this.
    Take your time.
    Spend at least 30 seconds on each pass.
    Breathe.
    Don’t hold your breath.
    If you’re holding your breath, you’re pressing too hard.
    Ease up a little.
    Do this for one minute.
    Then switch feet.
    【Find the ‘Ouch’ Spot】
    Okay, this is the secret sauce.
    You’re just rolling aimlessly?
    Stop.
    You need to hunt for the trigger points.
    These are angry little knots.
    They feel like hard pebbles.
    Or sticky spots.
    When you hit one?
    You’ll know.
    It might make you jump a little.
    “Yikes, that’s the spot!”
    Yeah.
    That’s the one.
    Don’t roll past it.
    Stop right there.
    Pause.
    Apply steady pressure.
    Imagine the ball is melting the knot away.
    Hold it for 20 to 30 seconds.
    It might hurt.
    But stay with it.
    After 30 seconds, take a deep breath.
    The pain should start to fade.
    That means it’s working.
    The tissue is letting go.
    Then keep rolling.
    Find the next angry spot.
    Usually, the inside of the heel is the worst.
    Or right in the center of the arch.
    Everyone is different.
    Listen to your feet.
    【The Toe Scrunch】
    Here’s a move I love.
    It’s called the scrunch.
    Get the ball right under the ball of your foot.
    That’s the padded part below your toes.
    Press down.
    Now, scrunch your toes down.
    Like you’re trying to grab the ball.
    Hold it for a second.
    Then release.
    Spread your toes wide.
    Do this 10 times.
    Why?
    It stretches the fascia.
    It contracts the muscles.
    It wakes up your foot.
    It feels so good after being in shoes all day.
    Our feet get lazy.
    We need to remind them how to move.
    This move does exactly that.
    【Don’t Forget the Heel】
    Let’s zoom in on the heel pain.
    That’s usually Plantar Fasciitis talking.
    Nasty stuff.
    Place the ball right on the center of your heel.
    This part is sensitive.
    Be gentle at first.
    Apply pressure.
    Then, rotate your ankle.
    Make circles with your foot.
    Keep the heel pressed on the ball.
    Circle left.
    Circle right.
    5 times each way.
    This breaks up the scar tissue.
    It mobilizes the ankle joint.
    It increases blood flow.
    Blood flow is healing.
    We want that.
    If it’s too tender?
    Sit on your hands.
    Use your arms to lift your body slightly.
    Take some weight off the foot.
    Control the pressure.
    You are the boss here.
    【The Daily Routine】
    How often should you do this?
    Every day.
    Seriously.
    Consistency is key.
    Don’t do it once and quit.
    It takes time to heal.
    I do it in the morning.
    Right before I get out of bed.
    Actually, I bring the ball to bed.
    Roll a bit before stepping on the floor.
    It warms up the fascia.
    Makes that first step less scary.
    Then I do it again at night.
    While watching TV.
    Total time?
    Maybe 5 minutes per foot.
    That’s it.
    10 minutes a day.
    Small investment.
    Huge return.
    【Why This Works】
    Let’s get nerdy for a sec.
    Your foot has a thick band of tissue.
    It connects your heel to your toes.
    It’s called the Plantar Fascia.
    When you run, or stand a lot…
    It gets tight.
    Micro-tears form.
    Inflammation builds up.
    That’s the pain.
    Rolling the ball acts like a massage.
    It’s myofascial release.
    Fancy word, right?
    Basically, it smoothes out the tissue.
    It breaks up adhesions.
    It increases blood flow.
    Think of it as ironing out a wrinkled shirt.
    Your foot is the shirt.
    The ball is the iron.
    It makes everything smooth again.
    【Common Mistakes to Avoid】
    Okay, don’t mess this up.
    Here are some traps I see people fall into.
    First, rolling too fast.
    Slow down, tiger.
    Fast rolling does nothing.
    It just slides over the skin.
    You need to move the muscle underneath.
    Slow is better.
    Second, only rolling the arch.
    Yeah, the arch feels good.
    But the heel and calf matter too.
    Sometimes heel pain comes from a tight calf.
    Roll your calf muscles too.
    Put the ball under your calf.
    Sit on the floor.
    Roll it out.
    It’s all connected.
    Third, giving up too soon.
    If it hurts, you think it’s bad.
    But sometimes, hurt means healing.
    Unless it’s sharp, shooting pain.
    That’s bad.
    Stop if you feel that.
    But dull ache?
    That’s just weakness leaving the body.
    【Check Your Shoes】
    Let’s be real.
    The ball helps.
    But your shoes might be the enemy.
    Are you wearing concrete blocks?
    Throw them out.
    Okay, don’t throw them out if they’re expensive.
    But stop wearing them daily.
    Look for support.
    Look for cushion.
    If you have flat feet?
    You need arch support.
    If your shoes are too tight?
    Your toes can’t spread.
    That causes tension.
    Tension causes pain.
    Get the right gear.
    Combine good shoes with the ball.
    That’s the winning combo.
    【When to See a Doctor】
    I’m just a blogger sharing what worked for me.
    I’m not a doctor.
    If your foot is swollen?
    Red?
    Hot to the touch?
    Go see a pro.
    If the pain doesn’t go away after a few weeks?
    Go see a pro.
    If you can’t walk at all?
    Definitely go see a pro.
    This ball trick is for maintenance.
    And for nagging pain.
    It’s not for fractures.
    Or serious injuries.
    Listen to your body, guys.
    It knows best.
    【Final Thoughts】
    Dealing with heel pain is exhausting.
    It affects your mood.
    Your workouts.
    Your life.
    But you don’t have to live with it.
    Grab a lacrosse ball.
    Start rolling today.
    Be patient.
    Be consistent.
    Your feet will thank you.
    Honestly, I wish I knew this sooner.
    I could have saved myself so many painful mornings.
    But hey, better late than never, right?
    So, who else is dealing with foot pain?
    Have you tried this before?
    Or are you going to try it tonight?
    Let me know in the comments!
    I want to hear your stories.
    And if you have any other tips, share them!
    We’re in this together.
    Happy rolling, friends! ✨👟🔥

  • Vibrating vs regular roller

    Vibrating vs regular roller

    Okay fam, let’s get real for a sec. We’ve all been there. Legs feel like lead after a run, or maybe you just slept wrong and your back is screaming. You look at the foam roller in the corner. Then you see those fancy vibrating ones online. The price tag makes your eyes water. So, the big question. Is the buzzing one actually better? Or is it just a glorified gimmick to take our money? I dug deep into the research and spent weeks testing both. Here is the honest truth. No gatekeeping, just facts.
    【The Basics: What are we even talking about?】
    Let’s break it down super simple.
    Standard Foam Roller. This is the OG. It’s just a cylinder of foam. You use your body weight to apply pressure. You roll back and forth. It hurts so good. It uses manual pressure to release tension.
    Vibrating Foam Roller. This looks the same but has a motor inside. It buzzes. It vibrates at different speeds. The idea is the vibration does the work for you. It claims to relax muscles faster and deeper.
    Think of it like this. The standard one is a deep tissue massage. The vibrating one is like a massage gun combined with a roller.
    【The Science: Does the buzz actually work?】
    I didn’t just guess here. I looked at actual studies. There was a solid study published in the European Journal of Applied Physiology in 2021. They looked specifically at the quads. They compared vibrating rolling vs non-vibrating rolling.
    Here is what they found. The vibrating roller (VFR) had a distinct edge.
    1️⃣ Range of Motion (ROM). This is huge. The vibrating group showed better improvements in flexibility right away. If you can’t touch your toes, this might help you get there faster.
    2️⃣ Muscle Resistance. The vibration actually changed the mechanical properties of the muscle. It lowered the passive resistance. Meaning your muscles were less stiff. They were more pliable.
    3️⃣ Force Production. Interestingly, both rollers helped maintain muscle force. But the vibration one helped you move better without losing power.
    So yeah, the science backs it up. It’s not just snake oil. The vibration seems to trick your nervous system. It helps the muscle relax more than just pressure alone.
    【The Real Talk: How do they actually feel?】
    Science is great. But what does it feel like in real life? I used both for a month. Here is the tea.
    The Standard Roller Experience.
    It is painful. Like, grit your teeth painful. Especially on tight IT bands. You have to really work for it. You are constantly adjusting your body to find the right spot. It takes effort. But after? You feel loose. It feels like you earned the recovery.
    The Vibrating Roller Experience.
    This is a game changer. The buzz distracts your brain. It hurts, but in a different way. It’s more of a “good hurt.” You don’t have to press as hard. The vibration penetrates deep into the tissue. It feels like the knots are just melting away. It’s honestly kind of addictive. I found myself looking forward to rolling out. Which never happens with the standard one.
    【Who is the Standard Roller for?】
    Let’s not throw the baby out with the bathwater. The standard roller is still a beast. It’s perfect for certain people.
    ✅ Budget Queens. If you have $20 vs $150, the choice is made. A basic high-density roller works wonders.
    ✅ The “No Pain No Gain” Crowd. If you like that intense, gritty pressure, stick to manual. You can control the pressure 100%.
    ✅ Travelers. Standard rollers are lighter. No batteries to charge. No worrying about it buzzing in your suitcase.
    ✅ Beginners. It teaches you body awareness. You learn exactly where your trigger points are by feeling them manually.
    【Who needs to upgrade to Vibrating?】
    If you have the budget, this is a nice treat. But some people really need it.
    ✅ Sensitive Souls. If you bruise easily or hate pain, the vibration helps. It increases blood flow without you having to crush your muscles.
    ✅ Serious Runners. The study showed it helps with ROM and stiffness. If you are training for a marathon, every bit counts. Recovery is key.
    ✅ Older Adults. As we age, our tissues get stiffer. The vibration can help improve circulation without high impact.
    ✅ People with Chronic Tightness. If you foam roll every day and still feel tight, the vibration might reach what the pressure can’t.
    【The Downside: Let’s be honest】
    Nothing is perfect. Let’s look at the cons.
    Standard Roller Cons.
    ❌ It hurts. A lot.
    ❌ It can be ineffective if you lack upper body strength.
    ❌ It’s easy to give up because it’s uncomfortable.
    Vibrating Roller Cons.
    ❌ Pricey. Like, really pricey. Some cost over $200.
    ❌ Noisy. You can’t use it while watching TV without blasting the volume.
    ❌ Heavy. It’s a chunk of gear to lug around.
    ❌ Charging. Yet another device to plug in.
    【How to Choose: Your Decision Guide】
    Don’t overthink it. Ask yourself these three questions.

    1. What’s your budget?
      If money is tight, get a good textured roller. It does 80% of the work for 20% of the price.
    2. What’s your pain tolerance?
      Low pain? Go vibrating. High pain? Stick to standard.
    3. How serious are you?
      If you roll once a month, don’t buy the expensive one. If it’s part of your daily routine, invest in the vibe.
      【My Final Verdict】
      If you are just starting out. Get a standard roller. Learn to love the grind. It builds character. And it saves you money.
      If you are already hooked on rolling. And you have the cash. Upgrade to vibrating. The science is there. The relief is real. It makes recovery feel less like a chore and more like a spa treatment.
      I personally keep both now. I use the standard one for warm-ups. Quick, light rolling to get blood moving. I use the vibrating one after a long run. When my legs are destroyed. It saves my life.
      【Pro Tips for Rolling】
      No matter which one you pick, don’t do it wrong.
      · Don’t roll directly on joints. Stick to muscle belly.
      · Don’t roll your lower back. It can mess up your spine. Use a ball for that.
      · Slow down. Rolling fast does nothing. Take your time on each spot.
      · Hydrate. Rolling pushes toxins out. Drink water to flush them.
      So there you have it. The vibrating vs regular roller debate. Settled.
      Which one are you team? Are you a vibration convert or a traditional roller die-hard? Let me know in the comments! 👇👇👇
  • Heated eye massager help

    Heated eye massager help

    Defining the Heated Eye Massager Experience

    Imagine a device that doesn’t just sit on your face but actively engages the ocular muscles and surrounding tissue through a combination of targeted thermotherapy and rhythmic compression. This, in essence, is the modern heated eye massager. It is not merely a sleep mask; it is a wellness gadget designed to mitigate the physiological toll of modern life—specifically, the relentless staring at screens that characterizes our daily existence. At its core, the device utilizes heat, vibration, and air pressure to simulate a massage, aiming to alleviate the tension that builds up in the orbicularis oculi muscle and the delicate areas surrounding the eyes.
    The utility of these devices goes beyond simple relaxation. For many, they represent a frontline defense against the discomfort of dry eye syndrome and the fatigue associated with prolonged visual focus. The market is saturated with variations, some featuring Bluetooth speakers for guided meditation, others incorporating red light therapy, but the fundamental value proposition remains consistent: the delivery of soothing heat and pressure to reset the visual system. It is a convergence of spa-grade luxury and therapeutic necessity, packaged in a portable, often futuristic-looking visor. Understanding this requires looking past the gadgetry and seeing it as a tool for ocular rehabilitation and stress management.

    How Heat Therapy Biologically Unblocks Relief

    The biological rationale behind these massagers is rooted in the anatomy of the tear film and the Meibomian glands. These glands, located within the eyelids, are responsible for secreting oils that prevent tears from evaporating too quickly. When we stare at screens, our blink rate decreases dramatically, leading to stagnation and thickening of these oils. This blockage results in the gritty, sandy sensation known as dry eye. Here, the application of heat is not just comforting; it is functional. By raising the temperature of the eyelid skin to a specific therapeutic range—typically between 104°F and 113°F (40°C–45°C)—the hardened oils liquefy, allowing the glands to express themselves more freely when the massager’s compression mechanism pulses against the lid.
    Furthermore, the heat induces vasodilation. The blood vessels surrounding the eyes dilate, improving circulation and flushing out metabolic waste products that accumulate during periods of intense focus. This increased blood flow brings fresh oxygen and nutrients to the overworked ocular muscles, helping to dissolve the knots of tension that contribute to headaches. It is a cascade of physiological responses: heat melts the stasis, compression aids the expression, and improved circulation restores homeostasis. The vibration component adds another layer, distracting the nervous system from pain signals and further relaxing the muscle fibers. It is a multi-sensory approach to resetting the eye’s delicate biomechanical environment.

    Critical Features to Evaluate Before Buying

    Navigating the specifications of an eye massager requires a discerning eye, as not all heat is created equal. The most critical metric is the temperature control mechanism. Cheap devices often rely on simple resistive heating that can spike to dangerous levels, risking thermal injury to the cornea or the delicate skin of the eyelids. A high-quality unit will maintain a steady, optimal temperature, usually offering adjustable settings to cater to individual sensitivity. Look for “constant temperature” technology or smart sensors that regulate the heat output, ensuring it stays within that therapeutic safety zone without overheating.
    Fit and adjustability are equally paramount. Because these devices rely on compression, a poor fit can render the massage ineffective or, worse, uncomfortable. An adjustable strap is a must, but the internal structure matters too—does it accommodate different face shapes? A device that pinches the nose or presses too hard on the temples will quickly be abandoned. Additionally, consider the weight. A heavy unit might slip down or cause neck strain during use. Material quality is another subtle but vital factor; breathable, hypoallergenic fabrics that can be wiped down or removed for washing are essential for hygiene, especially since the device is in direct contact with areas prone to bacteria transfer. Finally, assess the noise level; a motor that sounds like a jet engine will shatter any attempt at relaxation, negating the stress-relieving benefits.

    Real-World Scenarios Where Devices Shine

    The practical application of heated eye massagers spans a variety of contexts, making them a versatile addition to a wellness routine. For the corporate warrior glued to spreadsheets for eight hours a day, a fifteen-minute session with the device can act as a hard reset for the eyes, significantly reducing the blurry vision and soreness that typically set in by mid-afternoon. It serves as a proactive measure against Computer Vision Syndrome, creating a boundary between work and rest. Similarly, for students engaged in intense study sessions, the rhythmic pulsing can help maintain cognitive endurance by reducing the physical distraction of eye strain.
    Beyond the office or library, these devices find a place in the bedroom as a sleep aid. The combination of darkness (most block out light completely), warmth, and gentle massage creates an environment conducive to falling asleep. The physical relaxation of the facial muscles signals the parasympathetic nervous system to take over, lowering heart rate and preparing the body for rest. For those suffering from insomnia related to anxiety or physical tension, the routine of putting on the mask can become a Pavlovian trigger for sleep. Furthermore, individuals with mild Meibomian Gland Dysfunction (MGD) often use these devices as a supplementary treatment to maintain gland health between professional eye doctor visits, finding relief that artificial tears alone cannot provide.

    Common Pitfalls and When to Skip the Gadget

    Despite the benefits, heated eye massagers are not a universal cure-all, and there are specific scenarios where they should be avoided. The most significant red flag is the presence of an active eye infection. Conditions like conjunctivitis (pink eye), styes, or any inflammation involving the cornea can be exacerbated by heat and pressure. Applying warmth to an infected area can encourage bacterial growth and spread the infection, while the physical manipulation of the eyelid can rupture a stye or cause further irritation. If your eyes are red, swollen, or discharging pus, this is a time for cold compresses and medical intervention, not a heated massage.
    Moreover, individuals recovering from eye surgeries, such as LASIK or cataract removal, must adhere strictly to their doctor’s post-operative care protocols, which typically prohibit mechanical pressure on the eye for a set period. There is also a subset of users with specific conditions like diabetic retinopathy or severe glaucoma who should consult a specialist before using these devices. The increase in ocular blood flow caused by the heat could theoretically affect intraocular pressure, which is a critical concern for glaucoma patients. Finally, reliance on the device as a substitute for professional medical advice is a dangerous pitfall. While it can manage symptoms, it does not treat the underlying causes of chronic dry eye or vision deterioration. If symptoms persist despite regular use, the device is not the solution—comprehensive ophthalmic care is.

  • TENS for stiff shoulders

    TENS for stiff shoulders

    Setting the Stage for Relief

    Before you even peel the adhesive backing off those electrodes, pause for a moment. The environment in which you use a TENS (Transcutaneous Electrical Nerve Stimulation) unit plays a surprisingly pivotal role in its efficacy. You aren’t just turning on a machine; you’re initiating a physiological protocol. Ensure you’re seated in a position that doesn’t add strain to the very areas you’re trying to relax. A slouchy couch might feel good initially, but if it forces your neck into a forward-head posture, you’re fighting against gravity while the electricity fights against your pain.
    Cleanliness is non-negotiable here. We aren’t talking about a surgical scrub, but the skin surface must be free of oils, lotions, and dead skin cells. A quick wipe with an alcohol pad or a soapy washcloth, followed by thorough drying, drastically reduces impedance. Why does that matter? Because high impedance means the current has to work harder to penetrate, leading to a “stinging” sensation at the contact points rather than a deep, soothing buzz within the muscle tissue. If you have excessive hair in the target area, trimming it slightly can help the pads adhere better and conduct more evenly, though shaving isn’t strictly necessary unless the hair is so dense it prevents the pad from touching the skin.
    Check your device battery. A fading battery doesn’t just mean the session will cut short; it causes the output to drift. The amplitude might fluctuate, turning a steady therapeutic pulse into an erratic, uncomfortable twitch. Fresh batteries or a full charge ensure a consistent waveform, which is crucial for the “Gate Control Theory” of pain management to actually kick in. Have a glass of water nearby. Hydration isn’t often mentioned in TENS manuals, but well-hydrated tissue conducts electricity better than dehydrated tissue. Think of your muscles as sponges; a dry sponge doesn’t pass signals as effectively as a wet one.

    Mastering the Topography of Pain

    Here is where most people get it wrong: they treat the shoulder like a single, monolithic slab of meat. It isn’t. The shoulder girdle is a complex intersection of traps, deltoids, and rotator cuff muscles, each with its own fiber direction. Placing electrodes randomly is like throwing darts in the dark; you might get lucky, but odds are you’ll miss the bullseye.
    For the classic “tech neck” stiffness—that tight band right above the shoulder blade—you want to target the Upper Trapezius. Visualize the muscle running from the base of your skull down to your collarbone. The most effective placement here is often a vertical arrangement. Place one electrode pad about one finger-width above the collarbone, halfway between the neck and the shoulder joint. Place the second pad directly above it, perhaps two to three inches higher, along that same muscle line. This setup encourages the current to run parallel to the muscle fibers, often yielding a more comfortable, comprehensive contraction or sensation.
    If your pain is more localized to the side of the neck or the “pivot point” where the neck meets the shoulder, you might try a horizontal arrangement. Place one pad on the side of the neck (being careful to stay off the carotid artery and the front of the throat) and the second pad on the top of the shoulder, right over that knotted muscle. This creates a current flow that cuts across the grain of the tension, which can sometimes be more effective for breaking up specific trigger points.
    For the deep, aching stiffness in the actual shoulder joint or the rear deltoid, you need to shift your geography. Place one pad on the front of the shoulder (just below the clavicle, avoiding the sensitive armpit area) and the other on the back of the shoulder, over the posterior deltoid. This “sandwich” technique drives the current through the joint capsule itself. Remember, the goal isn’t to make the muscle flop around like a fish out of water—unless you are specifically doing a high-intensity session for muscle rehab. For stiffness relief, the sensation should be strong but manageable, a buzzing warmth that overrides the pain signals.

    Dialing in the Sensation

    Turning the knobs isn’t just about “more is better.” It’s about finding the specific frequency that speaks to your nervous system. TENS units generally operate on two distinct wavelengths, and confusing them is a common rookie mistake.
    High-frequency stimulation (often labeled as “Conventional” or settings above 50 Hz, usually 80-100 Hz) is your go-to for immediate, superficial relief. This works by flooding the neural pathways with non-painful data. According to the Gate Control Theory, these fast signals race up the spinal cord to the brain faster than the pain signals do, effectively closing the “gate” on the stiffness messages. It feels like a rapid, tingling vibration. The intensity should be high enough to feel strong and buzzing, but not so high that it causes your muscles to twitch rhythmically. You are looking for sensory dominance here, not motor contraction.
    Conversely, low-frequency stimulation (often labeled “Acu-like” or settings below 10 Hz) is a different beast entirely. This relies on triggering the release of your body’s endogenous opioids—endorphins and enkephalins. It feels different: slower, pulsing, and deeper. It might actually cause visible muscle twitches. This setting doesn’t usually provide instant gratification. The pain relief from low-frequency TENS is cumulative and often outlasts the treatment session, sometimes providing relief for hours after you take the pads off. It’s particularly useful for that deep, aching stiffness that seems to radiate from the bone.
    The pulse width (duration) matters too. A wider pulse width (200 microseconds or more) feels “deeper” and can be uncomfortable at lower amplitudes, while a narrower pulse width (50-100 microseconds) feels more “surface-level” and sharp. If you are new to this, start with a moderate pulse width (around 150-200us) and a frequency around 80-100Hz. Ramp up the intensity slowly. Let your body acclimate to the sensation. If you feel sharp, biting pain right under the pad, stop immediately. That usually means the contact is poor or the intensity is too high for that specific spot. Adjust, re-wet the pads if they’ve dried out, and try again.

    Avoiding Common Traps

    Now, let’s talk about the “don’ts”—the mistakes that turn a therapeutic session into a regrettable experience. The most critical safety rule involves the anatomy of the neck. Never, under any circumstances, place electrodes on the anterior (front) of the neck, specifically over the carotid arteries or the vagus nerve. Stimulating these areas can lead to a dangerous drop in blood pressure or even laryngeal spasms. Keep the pads posterior (back) or lateral (side), but strictly away from the windpipe and the pulse points on the front of the neck.
    Another frequent error is keeping the pads on for too long. While TENS is generally safe, leaving the electrodes in one spot for hours on end can cause skin irritation or even minor burns due to the prolonged electrical impedance. A good rule of thumb is to keep sessions between 15 and 30 minutes. If you want to do more, take a break. Remove the pads, let your skin breathe for an hour or two, then reapply them in a slightly different location if you need to treat a large area.
    Don’t drive or operate heavy machinery while using a TENS unit, especially if you are using a higher intensity that causes muscle twitches. An unexpected spasm in your shoulder could jerk the steering wheel. It sounds like common sense, but people often underestimate how distracting the sensation can be. Also, avoid falling asleep with the unit running. You might roll onto the control unit, accidentally cranking the intensity to maximum, and wake up in agony.
    Pregnant women should exercise extreme caution. While TENS is often used during labor for back pain, placing electrodes anywhere near the abdomen or the lower-to-mid spine during early pregnancy is generally contraindicated without a doctor’s specific approval. The effects of the electrical currents on fetal development are not fully mapped, so why take the risk? Similarly, if you have a pacemaker or an implanted defibrillator, TENS is usually a hard no. The electrical interference could disrupt the device’s rhythm management, which is a life-threatening scenario.

    Assessing the Outcome

    How do you know if it’s actually working? This isn’t always straightforward. Sometimes, the relief is instantaneous—the stiffness simply melts away as the gate control mechanism kicks in. Other times, especially with low-frequency settings, the relief is subtle. You might finish a session, take the pads off, and go about your day, only to realize an hour later that you haven’t rubbed your shoulder or winced when reaching for a cup of coffee.
    Keep a pain journal. It sounds tedious, but it’s the only way to objectively track what works. Rate your stiffness on a scale of 1-10 before you start. Note the settings you used (frequency, pulse width, intensity placement). Then, rate it again 30 minutes after the session, and then again the next morning. You might find that the “Conventional” high-frequency mode gives you an hour of relief, while the “Acu-like” low-frequency mode gives you four hours of relief but takes an hour to kick in. Knowing your own physiology allows you to customize the protocol.
    If you aren’t seeing results, don’t just crank up the voltage blindly. Re-evaluate your placement. Are you actually targeting the muscle belly, or are you on a tendon or bone? Electricity doesn’t conduct well through bone; it just hurts. Move the pads an inch to the left or right. Try changing the angle. Switch from a parallel placement to a cross-pattern. The body is dynamic; what works on Tuesday might not work on Thursday because the tension has shifted.
    Ultimately, TENS is a tool, not a cure. It is a highly effective way to manage the symptoms of stiff shoulders and interrupt the cycle of pain and muscle guarding, but it works best as part of a broader strategy. Combine it with stretching, heat therapy, and ergonomic adjustments to your workspace. Use the TENS to quiet the noise so you can do the work of actually fixing the underlying mechanics. When used correctly—respecting the anatomy, understanding the settings, and avoiding the pitfalls—it’s like having a reset button for your upper body, right there in your pocket.

  • Fix tech neck at home

    Fix tech neck at home

    What Tech Neck Actually Is

    Tech neck isn’t just a catchy buzzword for fitness magazines. It is a physical load issue. When you look down at a phone or slouch toward a laptop screen, the weight of your head shifts forward.
    Your head weighs about 10 to 12 pounds in a neutral position. For every inch it tilts forward, the pressure on your cervical spine doubles. It feels heavy because it is heavy. The muscles in your upper back and neck have to work overtime just to keep your chin from hitting your chest.
    This isn’t just about bad posture. It is a repetitive strain injury. You do it for hours. Kids and teenagers spend an estimated 5 to 7 hours a day on smartphones. Adults often match that for work, then add more screen time for entertainment at home. The tissue never gets a chance to recover.

    The Mechanics of the Slump

    The problem starts with the position but lives in the tissue. When you hunch forward, the muscles in the front of your neck—your deep neck flexors—get stretched out and weak. They stop doing their job.
    Meanwhile, the muscles in the back—your upper trapezius and levator scapulae—have to lock down to prevent your head from falling further. They are constantly contracting. They become ischemic, meaning blood flow is restricted because the muscle is so tight. Metabolic waste builds up. That’s the stiffness you feel halfway through the workday.
    It creates a imbalance. The front is too long and weak. The back is short, tight, and angry. If you just try to “stand up straight,” those weak front muscles can’t hold the position. You slouch back down within minutes because the tight back muscles pull you back into the familiar pattern.

    Finding the Knots

    You don’t need a doctor to diagnose this. You can feel it. The most common symptom is a dull ache at the base of the skull or right on top of the shoulders. But the real giveaway is the trigger points.
    Run your fingers along the top of your shoulder blade, right where it meets the neck. Feel around for a spot that feels like a hard pea or a piece of gristle under the skin. Press on it. If it sends a shooting pain up your neck or down your arm, or if it makes you wince, that’s a trigger point.
    These are hyper-irritable spots in the fascia surrounding the muscle. They are essentially stuck muscle fibers that have bunched together. They restrict blood flow and cause pain even when you aren’t moving. Ignoring them doesn’t work. They tend to get harder and more stubborn over time.

    The Ball and The Wall

    You can pay a massage therapist, or you can do this yourself. A lacrosse ball is the best tool for the job. It is firm, rubbery, and doesn’t compress much under weight.
    Find a doorframe or a clear wall. Place the ball between the wall and the meaty part of your shoulder, right on that trigger point you found earlier. Lean into it. It will hurt.
    Start with your body weight off the ball, using your legs to control the pressure. Roll around slightly until you find the exact epicenter of the knot. Once you have it, stop moving. Just lean into it. Take a deep breath. As you exhale, lean a little harder.
    Hold it for 30 to 60 seconds. The pain should start to subside or change to a duller sensation. That is the muscle releasing. Move the ball an inch higher or lower and repeat. Do this for two or three minutes per side.
    Don’t roll around frantically. Friction creates inflammation. You want sustained pressure to melt the adhesion. It shouldn’t be torture, but it shouldn’t feel like a Swedish massage either.

    Fixing the Workspace

    Ergonomics experts love to sell thousand-dollar chairs. You probably don’t need one. You need to change your geometry.
    The biggest issue with most home setups is the monitor height. If you are looking down at a laptop screen on a table, your neck is under constant tension. Raise the screen. Stack books under the laptop. Buy a cheap stand. Whatever it takes to get the top of the monitor at or slightly below eye level.
    When you look straight ahead, your neck muscles can relax. When you look down thirty degrees, they are engaging.
    Your elbows should be bent at ninety degrees, resting close to your body. If your keyboard is too far away, you will reach. Reaching causes the shoulders to round forward, which tightens the chest and pulls the neck forward. Pull the keyboard closer.

    Why Stretching Isn’t Enough

    Most people feel pain, so they stretch. They pull their head to the side. They roll their necks in circles. It feels good for a minute. Then the pain comes back.
    Stretching lengthens the muscle, but it doesn’t fix the weakness. You are taking a muscle that is already tired and overstretched in the front and pulling it more. You are taking a muscle in the back that is knotted and pulling it, but the knot remains.
    You need to strengthen the front. The chin tuck is the antidote to tech neck.
    Sit or stand with your back against a wall. Look straight ahead. Pull your chin straight back as if you are trying to make a double chin, but keep your eyes level. Don’t look down. You should feel a gentle contraction deep in the front of your neck.
    Hold it for five seconds. Release. Do ten reps. It feels awkward and looks silly. It is also incredibly difficult if those muscles are deconditioned. Do this three times a day. It retrains the body on where a “neutral” head position actually feels like.

    Building a Sustainable Routine

    You cannot fix this with one session of ball rolling. You are fighting gravity and your own habits.
    Set a timer. Every hour, stand up. Reset your posture. Do five chin tucks. Drink some water—the hydration helps the tissue quality.
    Be realistic about your habits. You aren’t going to stop looking at screens. But you can change how you look at them. Bring the phone up to eye level instead of dropping your head down to it.
    If the pain is sharp, shooting, or accompanied by numbness, stop. That is nerve involvement, and balls and walls won’t fix it. But for the dull, aching stiffness that defines the modern workday, pressure and posture are the cure. It takes five minutes. It costs the price of a lacrosse ball. It works.

  • Massage gun for DOMS

    Massage gun for DOMS

    Getting Ready to Fire

    You probably woke up today feeling like a truck hit you. That leg day seemed like a good idea three days ago. Now, walking down the stairs feels like a punishment. You grab the massage gun. You want the pain to stop. But if you just turn it on and start blasting your quads like a jackhammer, you might make it worse.
    First, check the battery. Nothing kills a recovery session faster than a dead device halfway through your calf. Find a spot where you can sit or lie down comfortably. You need to reach the sore muscles without straining your neck or back. If you have to twist your body weirdly to get the gun to your shoulder, don’t do it. You’ll just create a new injury.
    Plug in the attachment head. The ball fork is usually the safest bet for large muscle groups. The bullet head is for specific trigger points, but it’s aggressive. Save that for later. Make sure the head is locked in tight. You don’t want it flying off across the room.
    Take a look at your skin. If there’s a bruise, a cut, or varicose veins, put the gun down. You cannot use a massage gun there. Also, feel the area. Is it hot to the touch? Is the swelling bad? If yes, this isn’t the time. Ice it instead. Using a percussion massager on acute inflammation is like adding gasoline to a fire.

    The Routine

    Turn the device on. Start on the lowest setting. I don’t care how tough you are. If you crank it to max speed immediately, your muscles will tighten up to protect themselves. That defeats the purpose.
    Float the gun on the muscle. Let the head do the work. This isn’t a pressure test. You shouldn’t be digging the plastic into your skin. The new percussion guns, like the Theragun styles, pulse in and out. They stimulate the deep tissue by impacting it, not just by vibrating. Let the machine bounce off the muscle.
    Move slowly. One inch per second is a good rule of thumb. If you move too fast, you’re just sliding over the skin. If you stay in one spot too long, you can damage the tissue or nerves. Spend about 30 to 60 seconds per muscle group.
    Start by sweeping the larger areas around the pain. If your quads hurt, don’t go straight for the most painful knot. Work the sides of the thigh first. Get the blood moving. This improves circulation and warms up the fascia. Then, gradually work your way toward the sore spot.
    When you find a knot, hover over it. Breathe. It will hurt. Try to relax the muscle under the gun. This is the hardest part. Your brain wants to tense up. Don’t let it. Hold it there for another 15 seconds, then move on. You are looking for delayed onset muscle soreness relief, not torture.

    Where Not to Shoot

    There are places the gun should never go. The neck is risky. There are arteries and nerves there that don’t like high-speed impact. Stay away from the front of the neck completely. If you want to work on your traps, stay on the thick muscle above the shoulder blade.
    Don’t use it on your head. It sounds obvious, but people try. Don’t use it on your face or directly on the spine. Keep the attachments on the meaty parts of the body. Glutes, quads, hamstrings, calves. These are safe zones.
    Be careful around joints. You can get close to the knee, but don’t blast the kneecap. The tendons and ligaments there don’t have the same blood supply as muscles. They don’t recover the same way. Stick to the muscle belly.
    If you have a pacemaker or any implanted medical device, check with your doctor first. The vibration and electromagnetic waves can interfere with them. It’s rare, but better safe than sorry. Pregnant women should also skip using a massage gun for DOMS on the lower back and abdomen.

    When It Goes Wrong

    You pressed too hard. Now it feels burning instead of “hurts so good.” Stop. That burning sensation usually means nerve irritation or bruising. It means you were aggressive with the speed or the pressure.
    Sometimes the muscle feels worse the next day. It can happen. You might have broken up too much tissue at once. It creates more inflammation. In this case, rest. Hydrate. Use a heating pad to soothe the area instead of the gun.
    The gun is also making a rattling sound. If it’s knocking against bone or it’s loose, tighten the head. If you are using a cheap model, it might just be poorly made. If the motor smells like it’s overheating, turn it off. Let it cool down for twenty minutes. These motors need breaks, especially if you are using a massage gun for DOMS on large muscle groups like the back or glutes.
    Another common mistake is using it for too long. Ten minutes is plenty. If you spend twenty minutes on one quad, you aren’t helping. You’re just desensitizing the nerves. The area goes numb, and you lose the feedback that tells you if something is wrong.

    Checking the Results

    How do you know it worked? Wait an hour. Move the joint. Does it feel looser? Try to touch your toes. Is the range of motion better than before you started?
    The goal isn’t to eliminate all pain instantly. That’s not realistic. The goal is to reduce the tension so you can move normally. If you can walk without limping, the session was a success.
    Check for bruising the next morning. If there’s a big purple mark, you used too much pressure. Dial it back next time. The skin should look exactly the same as when you started.
    Using a massage gun for DOMS is about maintenance. It helps stimulate the lymph system and clears out metabolic waste. It helps you get back to the gym faster. Just remember: it’s a tool, not a magic wand. It works best when you combine it with stretching, good sleep, and enough water. If the pain persists for more than a few days, or if it’s sharp and shooting, put the gun away and see a professional. Sometimes, delayed onset muscle soreness relief requires more than just percussion.

  • Hand Therapy & Grip Recovery: Massage Tools That Actually Help

    Hand Therapy & Grip Recovery: Massage Tools That Actually Help

    Home Blog Hand Therapy & Grip Recovery

    Hand Therapy & Grip Recovery: Massage Tools That Actually Help

    Your hands are involved in virtually every daily task, from typing and cooking to driving and getting dressed. When grip strength declines or hand pain limits your function, the impact on quality of life is immediate and pervasive. Whether you are managing arthritis, recovering from surgery, dealing with carpal tunnel syndrome, or simply noticing that jars are harder to open than they used to be, structured hand therapy can make a measurable difference.

    In this guide, we examine the anatomy and common conditions behind hand weakness and pain, evaluate the evidence for at-home therapy tools, and provide a structured rehabilitation program you can follow using progressive-resistance therapy balls.

    Hand Anatomy: Why Grip Strength Matters More Than You Think

    The human hand contains 27 bones, 29 joints, and over 30 muscles—making it one of the most complex mechanical structures in the body. Grip strength depends on the coordinated function of extrinsic muscles (originating in the forearm) and intrinsic muscles (located within the hand itself). The interplay between these muscle groups allows everything from power grip (carrying grocery bags) to precision pinch (threading a needle).

    Grip strength is also a surprisingly powerful health indicator. Multiple large-scale studies have found that grip strength independently predicts cardiovascular disease risk, surgical recovery time, and overall mortality in older adults. A 2025 meta-analysis in the Journal of Geriatric Physical Therapy confirmed that grip strength below age-adjusted norms is associated with a 20–30% increase in all-cause mortality risk. Maintaining hand strength is not just about function—it is about long-term health.

    Common Conditions That Affect Hand Function

    • Osteoarthritis: Cartilage degradation in the finger and thumb joints causes pain, stiffness, and reduced range of motion. The CMC (carpometacarpal) joint of the thumb is especially vulnerable.
    • Rheumatoid Arthritis: Autoimmune inflammation of the synovial membrane leads to joint swelling, warmth, and progressive deformity if unmanaged. The MCP (metacarpophalangeal) joints are frequently affected first.
    • Carpal Tunnel Syndrome: Compression of the median nerve as it passes through the carpal tunnel at the wrist. Symptoms include numbness, tingling, and weakness in the thumb, index, and middle fingers.
    • Trigger Finger: Thickening of the A1 pulley sheath restricts tendon glide, causing the finger to catch or lock during flexion. Often worst in the morning.
    • De Quervain Tenosynovitis: Inflammation of the thumb extensor tendons at the wrist. Common in new parents (from repetitive lifting) and heavy phone users.
    • Post-Surgical Rehabilitation: After fracture fixation, tendon repair, or joint replacement, structured hand therapy is essential to restore strength and range of motion.

    The Evidence for Therapy Ball Exercises

    Hand therapy balls (sometimes called stress balls or rehab balls) have been used in occupational therapy clinics for decades. Their effectiveness is supported by multiple clinical studies:

    • A 2024 randomized controlled trial published in the Journal of Hand Therapy found that patients who performed structured grip exercises with progressive-resistance balls showed 34% greater improvement in grip strength compared to stretching alone after 8 weeks.
    • Research from the Arthritis Foundation demonstrates that regular hand exercises reduce pain and improve function in osteoarthritis patients, with benefits comparable to oral analgesics but without the side effects.
    • The American Society of Hand Therapists recommends progressive resistance training as a core component of rehabilitation following hand and wrist surgery.

    The key word is “progressive.” Using a single-resistance ball creates initial improvement but leads to a plateau. A multi-resistance set allows you to start gently and increase challenge as your strength improves—mirroring the progressive overload principle used in all effective rehabilitation programs.

    The 6-Week Grip Recovery Program

    This program is designed for general hand rehabilitation and grip strengthening. It uses the GripRestore Hand Therapy Ball Set (soft, medium, and firm resistance). Perform the routine once or twice daily.

    Weeks 1–2: Foundation (Soft Ball)

    The initial phase builds baseline strength and gets joints moving through their full range of motion without overloading healing tissues.

    1. Full Grip Squeeze (10 reps × 2 sets): Hold the soft ball in your palm and squeeze with all fingers for 3 seconds, then release slowly over 2 seconds. Focus on even pressure from all fingers. Rest 30 seconds between sets.
    2. Finger Spread (8 reps): Place the ball between two adjacent fingers and squeeze inward, then spread outward against the ball. Rotate through all finger pairs. This targets the interossei muscles.
    3. Thumb Press (10 reps): Press the ball against a tabletop using only your thumb. Hold 3 seconds. This strengthens the thenar eminence, which is critical for pinch grip and often the first area to weaken in arthritis.
    4. Gentle Wrist Flexion/Extension (8 reps each direction): Hold the ball and slowly curl your wrist up and down through its full range. This warms up the forearm muscles that power grip.

    Weeks 3–4: Progression (Medium Ball)

    Transition to the medium ball when you can complete all Week 1–2 exercises without pain or significant fatigue. Increase volume slightly.

    1. Full Grip Squeeze (12 reps × 3 sets): Same technique as before, but with the medium ball and increased volume. Focus on controlled release—the eccentric phase is where the most strengthening occurs.
    2. Individual Finger Pinch (10 reps per finger): Pinch the ball between your thumb and each finger individually. Hold for 3 seconds. This isolates the lumbrical muscles and improves fine motor control.
    3. Ball Roll (1 minute): Roll the ball around your palm using your fingers in a circular motion. This improves dexterity, coordination, and intrinsic muscle endurance.
    4. Wrist Pronation/Supination (10 reps): Hold the ball with your arm at your side, elbow bent 90 degrees. Rotate your forearm to face palm up, then palm down. This strengthens the pronators and supinators essential for tasks like turning doorknobs.

    Weeks 5–6: Advanced Strengthening (Firm Ball + Combinations)

    Use the firm ball for power exercises and the medium ball for endurance work. This phase builds functional strength that transfers to daily activities.

    1. Power Grip Squeeze (8 reps × 3 sets): Using the firm ball, squeeze maximally for 5 seconds, release over 3 seconds. Rest 45 seconds between sets. This targets maximum voluntary contraction.
    2. Sustained Pinch Hold (3 × 15 seconds per finger): Pinch the medium ball between thumb and each finger. Hold for 15 seconds. This builds isometric endurance critical for sustained gripping tasks.
    3. Combined Squeeze-and-Extend (10 reps): Squeeze the soft ball, then immediately spread your fingers as wide as possible against imaginary resistance. This trains the full flexion-extension cycle.
    4. Functional Simulation: Practice opening jars, turning keys, and buttoning shirts. Track which tasks have become easier as a tangible measure of your progress.

    Tips for Specific Conditions

    Arthritis Management

    Always warm up your hands before exercising—run them under warm water for 2–3 minutes or wrap them in a warm towel. Start with the soft ball regardless of your perceived strength level. Arthritis joints benefit more from high-repetition, low-resistance work than from maximal effort. If a particular joint is hot, red, or acutely swollen (a flare), skip exercises involving that joint until the flare subsides.

    Carpal Tunnel Syndrome

    Focus on nerve gliding exercises alongside grip work. Before each session, perform 10 median nerve glides: start with a fist, then progressively extend your fingers, wrist, and elbow until your arm is fully extended with fingers pointing toward the floor. Avoid exercises that increase numbness or tingling. Wear a wrist splint in neutral position during sleep if symptoms are worst in the morning.

    Post-Surgery Recovery

    Always follow your surgeon and hand therapist’s specific protocol. This program is not a substitute for professional post-operative rehabilitation. However, many hand therapists use progressive-resistance balls as part of their supervised programs. Do not begin any strengthening exercises until your surgeon clears you—typically 6–12 weeks post-surgery depending on the procedure.

    Build Stronger, Pain-Free Hands

    The GripRestore Hand Therapy Ball Set includes three progressive-resistance balls with an exercise guide to start your recovery today. Free shipping.

    Shop the GripRestore Set

    Frequently Asked Questions

    How quickly will I see improvement in grip strength?

    Most people notice functional improvement within 2–3 weeks of consistent daily exercise. Measurable grip strength gains (testable with a dynamometer) typically appear after 4–6 weeks. Maximum improvement usually occurs around 8–12 weeks, after which the focus shifts to maintenance.

    Can hand exercises help carpal tunnel syndrome?

    Yes, with appropriate modifications. Grip strengthening improves the muscle balance around the wrist, which can reduce pressure on the median nerve. Combined with nerve gliding exercises and ergonomic changes (keyboard position, mouse height, wrist splinting), hand exercises are a recognized component of conservative carpal tunnel management. See your doctor if symptoms are severe or progressive.

    Is it safe to exercise arthritic hands?

    Absolutely. The Arthritis Foundation and American College of Rheumatology both recommend regular hand exercises for arthritis management. The key is starting with low resistance, warming up before exercise, and avoiding exercise during acute flares (hot, swollen joints). Consistent gentle exercise reduces stiffness, maintains range of motion, and can decrease long-term pain.

    What is the difference between stress balls and therapy balls?

    Commercial stress balls typically have uniform, very soft resistance and are designed for casual squeezing. Therapy balls like the GripRestore set offer calibrated, progressive resistance levels (20 lb, 40 lb, 60 lb) specifically designed for rehabilitation protocols. The resistance levels are matched to clinical strengthening standards, allowing measurable progression. The material is also medical-grade and durable enough for daily therapeutic use.

  • Plantar Fasciitis Relief: Evidence-Based Home Recovery Routine

    Plantar Fasciitis Relief: Evidence-Based Home Recovery Routine

    Home Blog Plantar Fasciitis Relief

    Plantar Fasciitis Relief: Evidence-Based Home Recovery Routine

    Plantar fasciitis affects roughly 1 in 10 people at some point in their lives, making it one of the most common causes of heel pain worldwide. If you have ever experienced that sharp, stabbing sensation in the bottom of your foot during your first steps in the morning, you know how debilitating this condition can be. The good news is that most cases respond well to conservative, at-home treatment—when you use the right approach.

    In this comprehensive guide, we break down the anatomy behind plantar fasciitis, explain why traditional advice often falls short, and walk you through a structured, evidence-based recovery routine you can start today using simple massage and stretching tools.

    Understanding Plantar Fasciitis: More Than Just Heel Pain

    The plantar fascia is a thick band of connective tissue that runs along the bottom of your foot, connecting the heel bone (calcaneus) to the base of the toes. It functions as a natural shock absorber and supports the arch during walking, running, and standing. When this tissue is subjected to excessive or repetitive stress, micro-tears develop at the calcaneal attachment point, triggering inflammation and the characteristic heel pain.

    However, recent research has shifted our understanding. Many chronic cases are now classified as plantar fasciosis rather than fasciitis, indicating degenerative changes rather than acute inflammation. This distinction matters because it changes the treatment approach: anti-inflammatory strategies alone are insufficient. Effective recovery requires mechanical stimulation to promote tissue remodeling and collagen synthesis.

    Common Risk Factors

    • Overuse: Sudden increases in walking, running, or standing duration are the most common trigger.
    • Footwear: Flat shoes, worn-out soles, and inadequate arch support increase strain on the fascia.
    • Biomechanics: Flat feet (overpronation), high arches, tight Achilles tendons, and weak intrinsic foot muscles all contribute.
    • Occupation: Jobs requiring prolonged standing on hard surfaces—nurses, teachers, retail workers, chefs—carry elevated risk.
    • Weight: Higher body weight increases the compressive load on the plantar fascia with every step.

    Why Most Home Remedies Fall Short

    If you have searched for plantar fasciitis relief before, you have likely encountered advice like “rest, ice, and stretch.” While these strategies are not wrong, they address symptoms without solving the underlying problem. Here is why each one alone is insufficient:

    • Rest alone reduces acute pain but does not promote tissue repair. The moment you resume activity, pain returns because the fascia has not been strengthened or remodeled.
    • Ice can help manage acute flare-ups, but chronic plantar fasciosis involves tissue degeneration, not active inflammation. Cooling the area may actually slow the healing response.
    • Static stretching temporarily lengthens the tissue but does not address the stiffness and adhesions that restrict fascial glide. Without mechanical stimulus, the tissue remains vulnerable to re-injury.

    Effective recovery requires a combination of mechanical stimulation (massage and myofascial release), progressive loading (strengthening exercises), and lifestyle modifications (footwear, activity management). The routine below integrates all three components.

    The 4-Week Evidence-Based Recovery Routine

    This routine is based on principles from sports medicine and physical therapy research. It uses a foot massage roller as the primary tool, combined with bodyweight exercises. Perform the routine once in the morning and once in the evening for best results.

    Week 1–2: Pain Management and Tissue Mobilization

    The initial phase focuses on reducing pain sensitivity and restoring basic fascial mobility. During this period, keep all exercises at low to moderate intensity.

    1. Gentle Rolling (2 minutes): Place a foot massage roller on the floor. Sit in a chair and roll your foot over it from heel to toe with light pressure. Focus on covering the entire sole. If you find a tender spot, pause and hold gentle pressure for 10 seconds before continuing. The goal is desensitization, not deep tissue work.
    2. Towel Stretch (30 seconds × 3): Sit with your leg extended. Loop a towel around the ball of your foot and gently pull your toes toward you until you feel a stretch along the sole and calf. Hold for 30 seconds. This lengthens the Achilles-plantar fascia complex.
    3. Marble Pickup (1 minute): Place 10–15 marbles on the floor. Using only your toes, pick them up one at a time and place them in a bowl. This activates the intrinsic foot muscles that support the arch.

    Week 3–4: Progressive Loading and Strengthening

    Once baseline pain has decreased, increase intensity to promote tissue remodeling and build resilience against future injury.

    1. Deep Tissue Rolling (3 minutes): Using the ProRelief Foot Massage Roller, stand and place moderate body weight through your foot onto the roller. Roll slowly, spending extra time on the arch and heel. The textured acupressure nodes provide targeted stimulation that mimics clinical myofascial release techniques.
    2. Eccentric Heel Raises (12 reps × 3 sets): Stand on a step with your heels hanging over the edge. Rise up on both toes, then slowly lower on the affected foot only over 3–4 seconds. Eccentric loading is the single most evidence-supported exercise for tendon and fascial repair.
    3. Single-Leg Balance (30 seconds × 3): Stand on the affected foot with eyes open. Once stable, try closing your eyes. This trains proprioception and activates the small stabilizer muscles that protect the arch under load.
    4. Arch Doming (10 reps × 3 sets): While standing, try to shorten your foot by pulling the ball of your foot toward your heel without curling your toes. Hold for 5 seconds. This exercise, sometimes called the “short foot” exercise, directly strengthens the plantar intrinsic muscles.

    Lifestyle Modifications That Accelerate Recovery

    Footwear Optimization

    Your shoes are the single most controllable environmental factor. Look for firm heel counters, built-in arch support, and cushioned midsoles. Replace running shoes every 300–500 miles. Avoid walking barefoot on hard surfaces, especially in the morning when the fascia is at its stiffest. A pair of supportive slippers by the bed makes a meaningful difference in morning pain levels.

    Activity Management

    Do not stop moving—complete rest often makes plantar fasciitis worse by allowing the fascia to stiffen. Instead, modify your activity: reduce running volume by 30–50%, switch to low-impact alternatives like cycling or swimming on high-pain days, and increase activity gradually (no more than 10% per week). Stand on cushioned mats if your job requires long periods on your feet.

    Night Splints

    If morning pain is your primary complaint, a night splint (or a Strassburg Sock) holds the foot in slight dorsiflexion while you sleep, preventing the fascia from tightening overnight. Research shows night splints improve morning pain in 80% of users within 1–3 months.

    When to See a Doctor

    Self-treatment is appropriate for most cases of plantar fasciitis, but you should consult a healthcare professional if:

    • Pain persists beyond 6–8 weeks of consistent home treatment.
    • Pain is severe enough to prevent normal walking.
    • You notice numbness, tingling, or swelling in the foot.
    • Pain occurred suddenly after an injury or impact.
    • You have diabetes or peripheral vascular disease.

    A physician or podiatrist can rule out other conditions (stress fracture, nerve entrapment, fat pad atrophy) and may recommend additional interventions such as custom orthotics, corticosteroid injections, or extracorporeal shockwave therapy.

    Start Your Recovery Today

    The ProRelief Foot Massage Roller provides the targeted myofascial release your plantar fascia needs to heal. Medical-grade materials. Therapist-designed. Free shipping.

    Shop the ProRelief Roller

    Frequently Asked Questions

    How long does plantar fasciitis take to heal?

    With consistent treatment, most people see significant improvement within 6–12 weeks. However, complete resolution can take 3–6 months or longer for chronic cases. The key is consistency—performing your recovery routine daily, even after pain begins to improve, to build tissue resilience and prevent recurrence.

    Is it okay to exercise with plantar fasciitis?

    Yes, but modify your activity. Avoid high-impact exercises that aggravate symptoms (like long-distance running on concrete). Low-impact alternatives such as cycling, swimming, and elliptical training maintain fitness while reducing fascial stress. Gradually return to full activity as pain decreases, following the 10% rule for weekly volume increases.

    Should I use ice or heat for plantar fasciitis?

    For acute flare-ups (sharp pain, noticeable swelling), ice for 15–20 minutes can help manage symptoms. For chronic, dull aching pain, gentle warmth before your massage routine can increase blood flow and improve tissue pliability. Many physical therapists recommend rolling your foot over a frozen water bottle for a combined massage-and-cooling effect.

    Can plantar fasciitis come back after it heals?

    Recurrence is common if the underlying risk factors are not addressed. Continue your strengthening exercises 2–3 times per week even after symptoms resolve. Maintain supportive footwear, manage activity progression, and use your massage roller for preventive maintenance. Think of it as ongoing foot hygiene, similar to brushing your teeth to prevent cavities.